We are pleased to announce we have just finished making the el panels that have been inspired by the new Tron: Ares movie that is due to launch at the end of october
Of course it is impossible to create a completely accurate replica set, since the movie has not come out at the cinemas yet
so we have taken some artistic license to create red glowing el panels that we feel will reflect the style and the mood of the movie
take a look here and see if you think we have succeded in capturing the essence of the new film:
Making a Faux Neon Sign is easier that it sounds
Whether you use more that 25 kilometer of EL Wire to make giant faux neon signs like we supplied Helix3D for this massive Xbox presentation
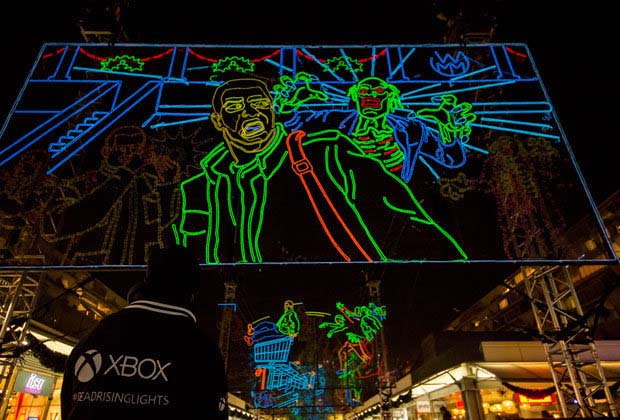
or you just want to make a fake neon sign with EL Wire for your shop or home
We can Help... and to get inspired... here are some examples of faux neon signs that our creative customers have made.
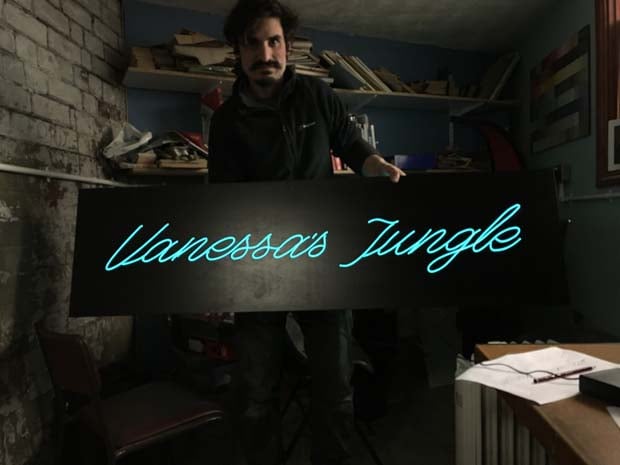
This recent project for a bar sign was made by first generating a computer image for the fake neon sign and agreeing it with the client:

The order was placed and we sent him the EL Wire and all the bits to drive it.
This faux neon sign was about 90cm x 80cm
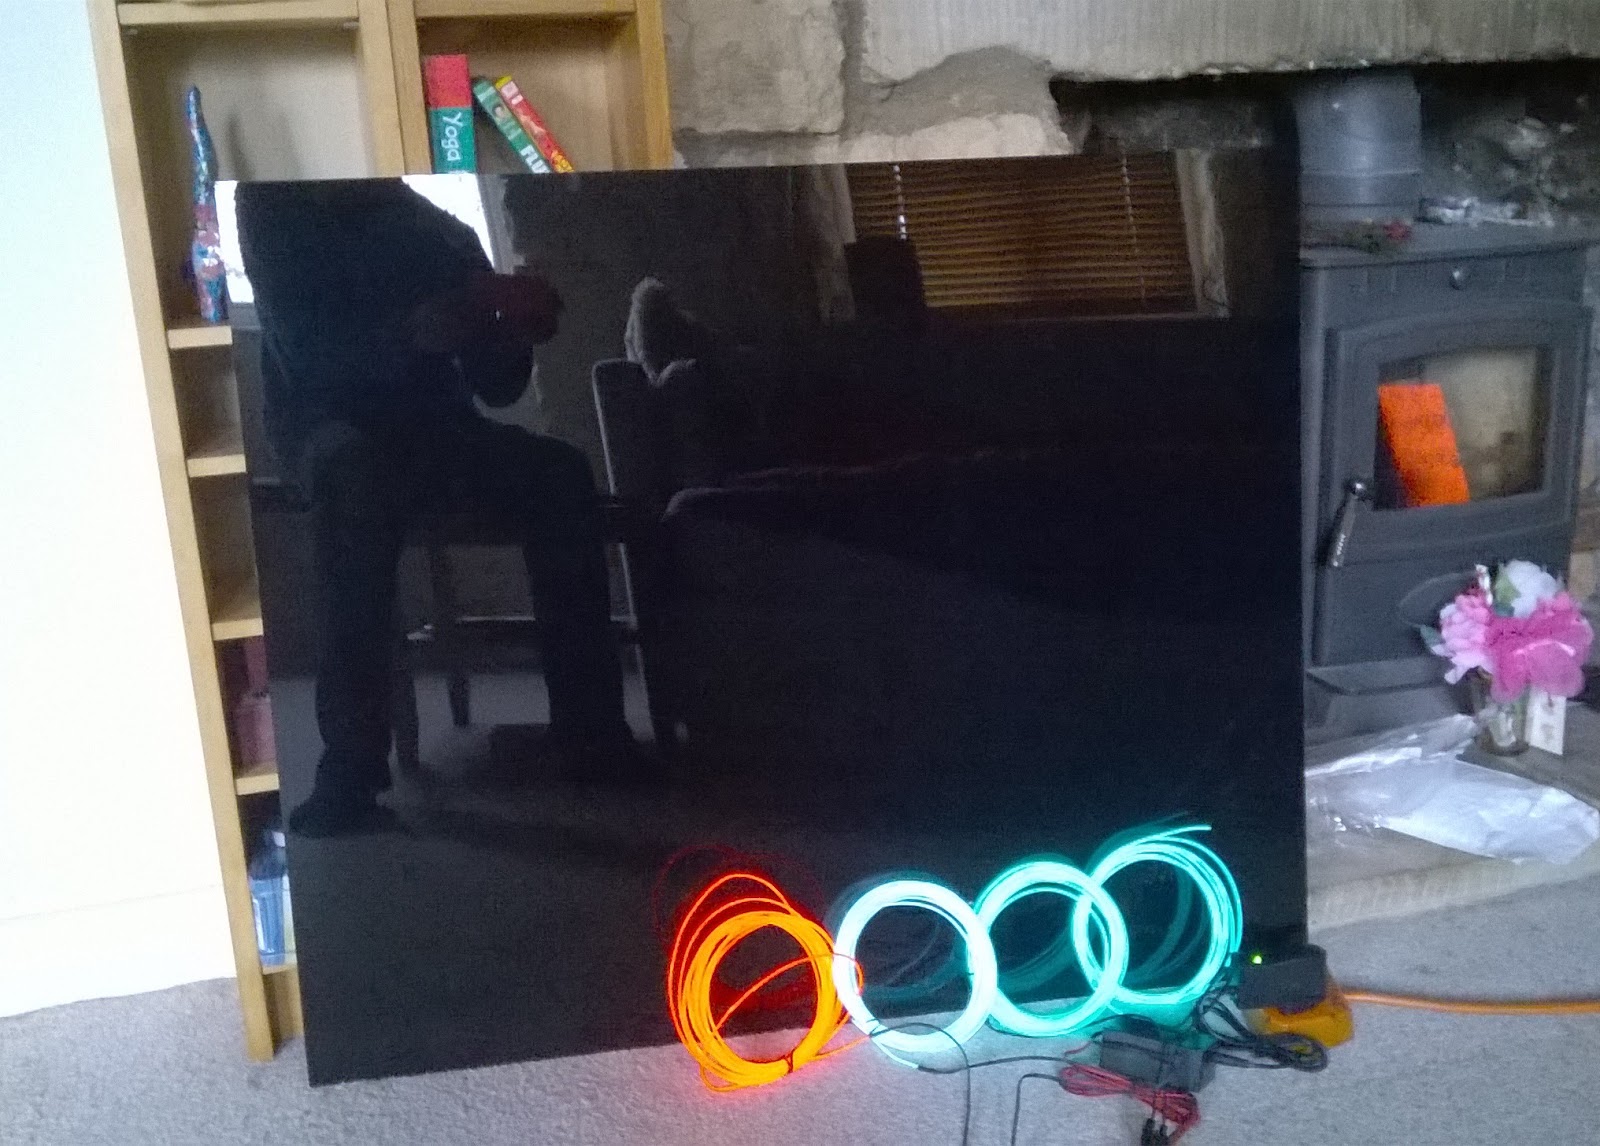
To transfer the image from the laptop to the perspex, a digital projector and white marker pen was used:

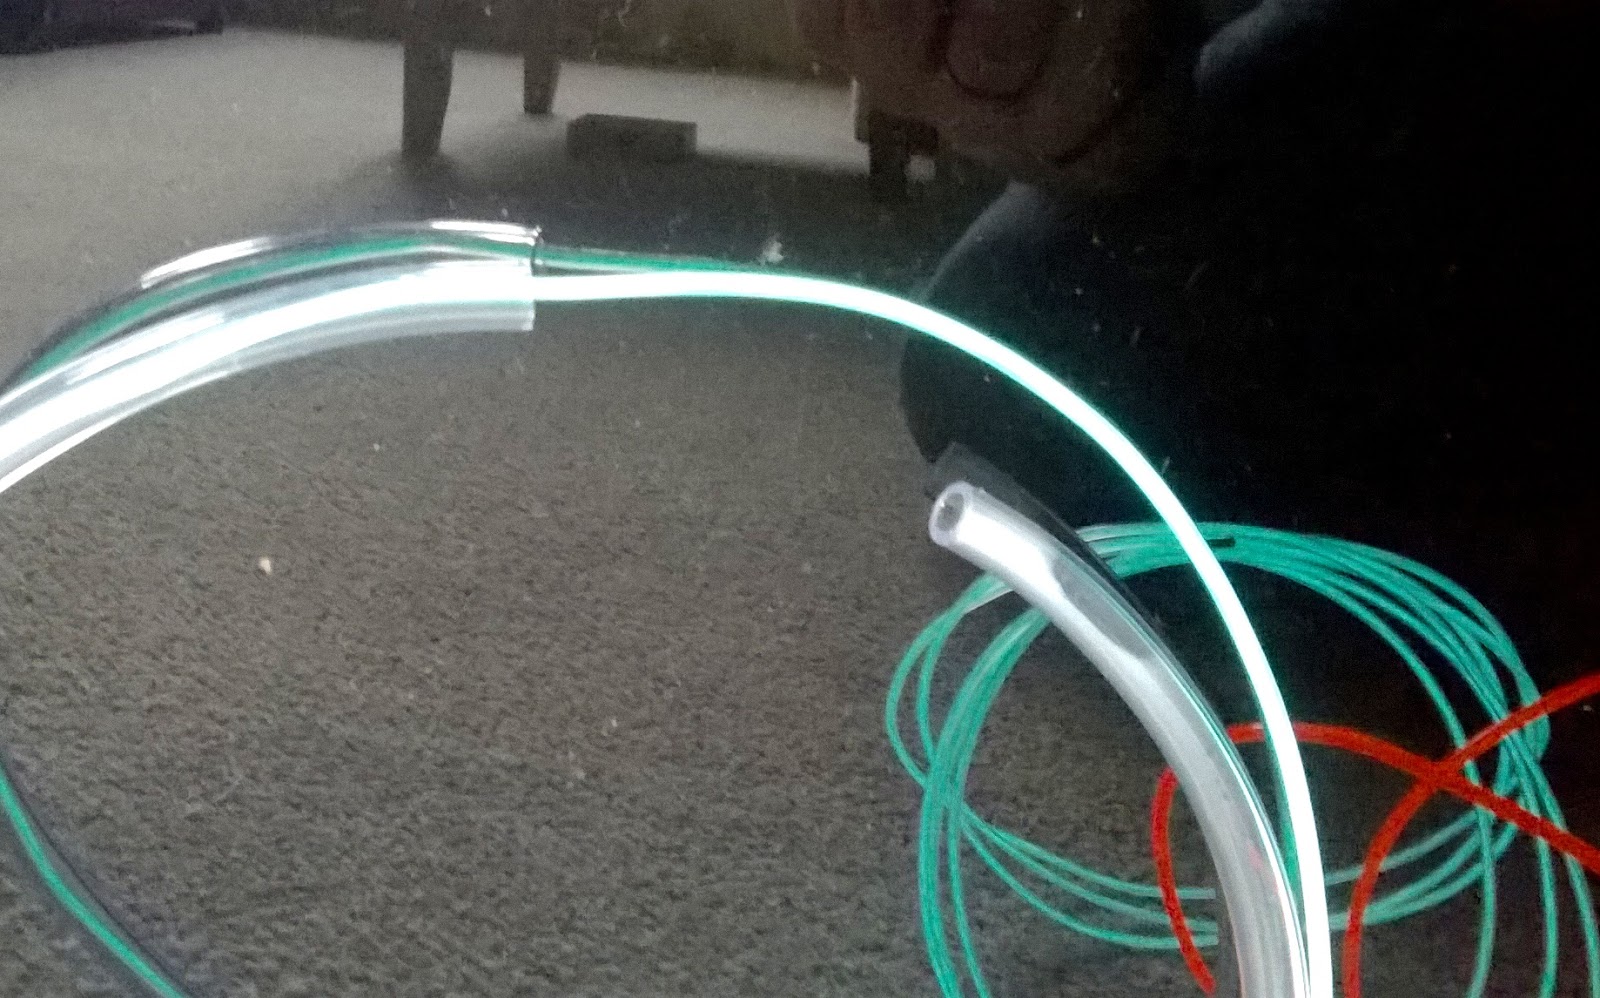
The El Wire was threaded through a clear plastic tube and glued to the sign

The glue took 24 hours to fully set and tape was used to hold the letters in place.
>When it was finished, the faux neon sign looked great......

Our good friend the Flashing Frog has been kind enough to share with us, his in depth walkthrough on 'how to make a Faux Neon Sign' on his blog where you will find some great tips.
Cheers, Frog xx
Another Faux Neon Sign made by a customer is this wicked Buick Sign
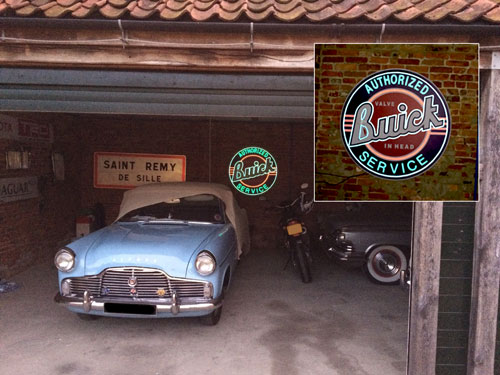
With this neon sign there is no need for a projector. The text is already printed on the sign.
All you have to do is drill holes to thread the EL Wire though and some strong glue to secure the EL Wire in Place.
Make sure you have measured the text. Getting the right length is important as you don't want to come up short on the El Wire.
Knowing how much EL Wire you need, will determine what driver/inverter you will require to light the EL Wire.
The thickest EL Were we stock is 5mm which is still about 1/4 the width of Neon Tubing but we dont really recommend using the 5mm. It is the least bright of our selection of el wires, and it still does not replicate a neon look.
A better solution is to use one of the thinner wires and 'bubble write' or fill plastic tubing to give the impression of neon lighting
We have a 'Sign Making Kit' in our store that is a plug and pay
Faux neon signs are only limited by your imagination. Here are some more Faux neon signs made with our EL Wire
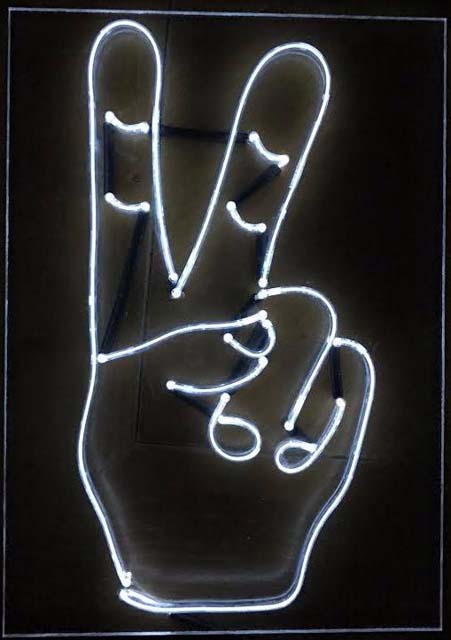
Faux neon victory sign in el wire
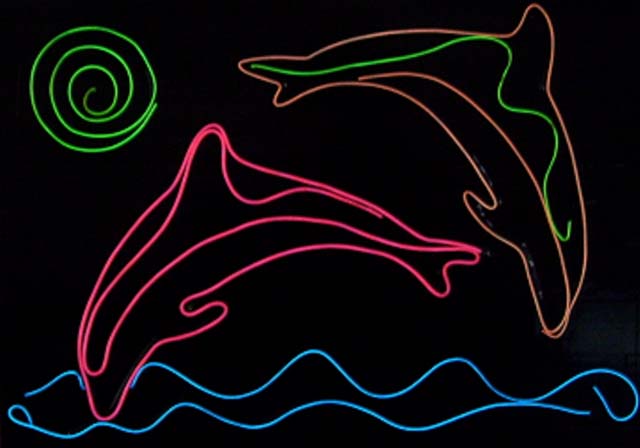
Faux neon dolphin sign in el wire
Can EL Panels be used for flat-field correction?
We are often asked this question by people wanting to buy el panel for flat-field correction and to answer it we have one of our customers who has successfully used an A4 EL Panel for this purpose
Of course you will need a different size panel depending on the size of the telescope you are calibrating
These are the ones you may find useful:
As well as mains power for the EL Driver, we have 12v li-ion Rechargable batteries or of you want to run this kit off your own 12v power source, then crocodile clips that plug into our portable EL Drivers are available here
Customer Report on EL Panel for Flat-Field Correction
You'll remember that we exchanged emails following my purchase of an A4 EL panel from you last month via ebay.
In your last email you asked whether the panel would be bright, white and even enough for telescope calibration, and I said I would let you know how it performed once I had it all set up.
For use, I sandwiched the EL panel between a sheet of black acryllic and a sheet of opal frosted acryllic, bound the edges together with black plastic insulation tape, and fixed the assembly into a deep A4 picture frame.
The attached images show how the panel performs in producing flat-fields for the correction of astronomical images. A 6-inch reflecting telescope and astronomical camera with an APS-size CCD colour sensor were used.This is the maximum size of telescope that can be calibrated with the A4 panel.

The panel was placed directly onto the telescope tube. With the particular camera I used, the exposure needed to give around 33% saturation of the sensor (the ideal value) was 0.25sec. So brightness is perfectly adequate for the purpose.
The attached images include the flat-field obtained and an analytical map of the brightness distribution. The vignetting is entirely due to the optics of the telescope. There is no detectable unevenness arising from the EL panel alone.

I have not tested the spectral distribution of the panel. Many astronomical cameras use monochrome sensors and colour images are obtained by combining exposures taken through red, green and blue filters, as well as some special narrow-band filters designed to highlight specific radiation from hydrogen, oxygen, etc. I expect that flats obtained using these filters will need different exposures to compensate for differences in the emission spectrum of the EL panel.
Two of the attached images show a picture taken last week of the galaxy pair M81 and M82, with and without correction using the flat field panel. The 'without correction' picture is a raw image before any processing - the 'with correction' picture shows the result of flat-field correction combined with processing using specialised software to manipulate the brightness range of the image.
These are a very good results and I think it fair to say that a perfectly adequate set-up can be made using your panels.
Thanks for your help getting the panel to me and sorting out the glitches.
Raw Image:

With Flat-field Correction:

-
Here we have news of the latest innovations and items we have in the store
this could be anything from a new type of speciality splitter to the latest generation of EL Wire
New EL Panel and Tape Website
This latest news isn't about a fantastic new product![]()
instead, get ready to hear about an incredible new website!
EL Wire and EL Panels are based on the same technology
you could consider the EL Panels to be EL Wires that have been flattened out into incredibly thin sheets
They can use the same EL Drivers as well as the same splitters and extenders
But there are some items that are specialist to EL Panels
so to prevent any confusion we are proud to announce our new website dedicated to EL Panels and EL Tape:
![]()
Hoops
These small half centimetre clear plastic hoops are the ultimate accessory for attaching EL Wire to costumes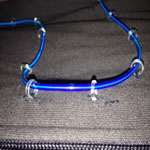
Just sew the hoops on and then thread the el wire through them
Ideal if you want to wash the garment or change the wire
Most of our EL Sets now come with these as extras
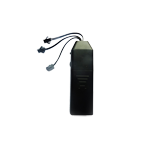
Adaptable 12V Drivers
The most flexible and versatile drivers available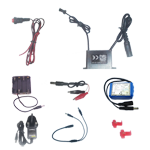
These Adaptable EL Drivers have been developed so you can use the same driver with a choice of different power inputs
1) Use the same driver for mains input (UK, Euro or US) and then hot swap it for 12v battery
2) Or maybe you want to use a 12v li-ion rechargable to power the driver
3) Its not just the ability to swap the input, its great that there is such a big selection of inputs so you can get the right one for your project
4) Chose from between: Mains, 8xAA Battery Box, Li-ion Rechargable Battery, Crocodile clips to your own 12V Source or Self-stripping wire connectors to help you fix it into your cars 12V loom
5) Theres even a Remote Control Unit you can plug into it!
Ultra EL Wire
Finally, the next generation of EL Wire has arrived!
The Ultra EL Wire is everything we had hoped from the Double Core EL Wire.... and more
1) Really is noticeably brighter than standard EL Wire
2) Has a thicker, more visible core
3) Have to use a Driver that is double the capacity of the wire, (eg a 5m length of Ultra EL Wire uses a driver rated for 10m standard EL Wire) so a more powerful driver will make it glow even brighter
4) The thicker core means it holds whichever shape it is bent into
-
EL Wire Splitter Switch
This may look like just a 2 way splitter with a switch in the middle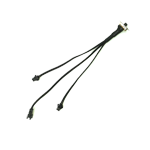
and thats because its exactly that!
but its power lays in your imagination
perhaps you have two glowing EL Wire costumes, one over the other and want to switch between them to cause bewilderment and wonder
then choose the EL Wire Splitter Switch with middle ALL OFF
or maybe your design requires you occasionally isolating two parts of your glowing costume in the middle of a performance
then you would need the EL Wire Splitter Switch with MIDDLE ALL ON
-
Clu, Gem and Siren Costumes
You crazy cosplay fans just didn't seem satisfied with our selection of Glowing EL Panel Sam Flynn, Quorra and Rinzler (and mini Rinzler) costumes
So we have added 2 more Tron Style Costumes
We now have:
Clu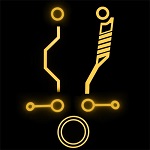
and Siren Gem
Ultra Chasing EL Wire
Chasing EL Wire gives a great effect but has never been as bright as standard EL Wire
but all that has changed with this new Ultra Chasing EL Wire
It is by far brighter than the standard Chasing EL Wire
- but at a cost;
you should use a driver that is 2 or 3 times more powerful than if you were using standard chasing EL WIre
Eg a driver that is good for 3m of standard Chasing EL Wire
will be ideal for 1m of Ultra Chasing EL Wire
for this reason we are supplying it in lengths of 33cm, 1m, 3m and 5m
-
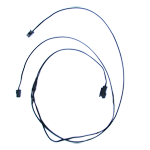
Speciality Splitters
Somebody please stop us if you think we are going to far with these constant EL innovations
Of course we have a selection of splitters that plug into your EL Driver making it able to run more than 1 EL Wire, EL Tape or EL Panel off the same Driver
and we have from 2-way up to 6-way splitters in standard sizes (40cm total length) and also mini EL Splitters (20cm Total Length) for when you are working in a tight space
if you thought that just about covered it as far as splitters are concerned then im here to tell you it was just the beginning
maybe one of these is the perfect solution for your EL Project:
a 70cm 2 Way splitter
(good for running down each leg)
-
a 70 cm 3-way splitter
(good for running down each leg on an alien costume)
-

a 2-way splitter with one Short and one Long connector
(good if you want one piece to start at the upper arm and the other at the wrist)
-
a 3-way with 1 Short and 2 Long Connectors
(good for getting one channel to the Back and the other two going to each arm)
-
a 3-way with 1 Short, 1Medium, 1 Long connector
(OK we give up trying to guess what you crazy cats will use these for)
-
-
EL Driver with remote triggers
We designed and made these new type of EL Driver for performers who need control of switching the EL Wire ON/OFF during a performance without messing about with fiddly buttons
and we now have it in 2 styles:
Basic Trigger Driver Dance Act Driver
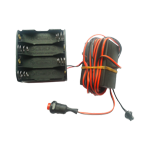
The El Driver can sit on the body with the EL Wire coming out of it as usual
But the ON/OFF plunger is on a long 1.2m wire that can run down the sleeve of your costume and fit comfortably in your hand
We have now found that lightpainters also find this setup easy to use and control (the plunger switch either clicks on/off or by half depressing the button you can also easily control the light)
and now more of you are using these drivers to great effect by freaking people out at festivals and parties using this trigger controller
Adjustable Speed Sequencer
 this small portable EL Driver lets you control the speed of simple 1-2-3-1-2-3-1-2-3 sequencer using the speed-control dial on the side
It is really effective when you put splitters on the end of the outputs to create climbing or chasing effects
Double Core EL Wire
We have finally managed to get some Double Core EL Wire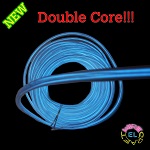
instead of just a single glowing core of EL Wire - this has 2 cores running through it
From experimenting with this wire we have found the best results are to use the twin cores as an excuse to 'overpower' this EL Wire and use a driver that would usually be for a longer length of EL Wire
The Double Core EL Wire on its own is no way twice as bright as the standard EL Wire
but because for example a 5m length of Double Core is really 2 x 5m lengths of El Wire you can use a more powerful driver
eg the 10-30m driver instead of the 5-15m driver
this will allow you to squeeze some extra brightness out of it
If EL Wire is the right material for your project then you are in the right place
in this store we proudly offer the worlds finest selections of EL Wire and accessories
Below you will find details of premier quality and specialist EL Wires as well as choices to suit every budget
* Please note we only supply EL Wire that already has a connector attached to it*
this means there should be no need for you to get involved with a soldering iron (unless of course you want to) and everything is simply 'plug and play'
for that reason we generally stick to having these lengths of EL Wire in Stock:
10cm, 50cm, 1metre, 3metre, 5metre, 10m, 15m, 25m, 50m and 100metre
all with a connector already soldered in place ready for the EL Wire to be plugged into a splitter or EL Driver
(Other custom lengths can be arranged for you but it is unlikely they will be sent out the same day.)
The standard El Wire comes in 4 diameters (1.3mm, 2.3mm, 3.2mm, 5mm)
these EL Wires are a different thickness but it is worth remembering that the core running through the middle is exactly the same in all these - it is just the sleeve that is thicker
(this can effect the brightness with 1.3mm being the brightest and 5mm being least bright)
Types of EL Wire
1.3mm EL Wire
is £4 per metre
This is often called ‘Angel Hair’ and is useful for weaving into tight shapes
this wire and the ULTRA EL Wire are the only ones that hold their shape rigidly when bent
it is £4 per metre and available in these lengths:
(10cm, 50cm, 1m, 3m, 5m, 10m, 15m and 30m)
-
2.3mm EL Wire
is £2.50 per metre
This is the cheapest mass produced standard EL wire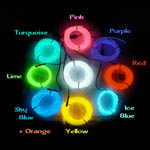
and is the type of wire you would get in cheap ebay blister packs
we always source it from a decent manufacturer so it is not so prone to bending fatigue as other 2.3mm el wire you may find for sale
(1m, 3m, 5m, 15m and 100m)
-
3.2mm EL Wire
is £3 per metre
This high quality wire is good for most applications,
it is strong, durable and still about as bright as the 3.2mm el wire
having a thicker sleeve offers support for the copper core, helping to prevent failing because of continual bending
This is called bending fatigue and unfortunately the copper in the core of the wire is prone to this stress
the sleeve on this wire can only go so far to prevent this wearing away,
users of EL Wire should remember not to place the wire where this type of bending will occur (eg elbows and knees)
(50cm, 1m, 3m, 5m, 10m, 25m and 50m)
-
5mm wire EL Wire
is the thickest sleeve we offer
there are some projects that demand a thicker wire
If you want the EL Wire chunky look, then this is the one is for you
(10cm, 1m, 3m, 5m, and 10m)
Speciality EL Wires
Ultra EL Wire (2.6mm)
is £6 per metre
this is the next generation of EL Wire
It is the brightest available EL Wire with a thicker glowing core than the standard EL Wire
The thick copper core also means this wire rigidly holds its shape when bent
It is important to note that The Ultra wire needs more power than standard EL Wire to make it glow
It uses standard EL Wire Drivers but you have to double the amount of EL Wire to reach the correct rating
eg 10m of Ultra EL Wire needs a driver that is designed for 20m of standard EL Wire
If it is premium quality wire you need then Ultra EL Wire is the one for you
We supply it in 2.6mm but it is also available in 5mm upon request
(50cm, 1m, 2m, 3m, 5m, 10m, 25m)
-
Sewable Piping EL Wire (2.3mm)
- £3.50 per metre
This wire has a tag running alongside it that means it can be easily sewn into the seams,not only in cars but as piping along the seams inside vehicles
(50cm, 1m, 3m, 5m, 15m)
-
Standard Chasing EL Wire (2.3mm)
- £5 per metre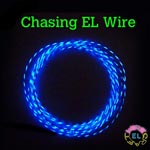
Chasing EL Wire has to be seen to be believed
it requires its own type of Chasing Driver that is different than the standard EL Wires Driver
(50cm, 1m, 3m, 5m, 10m, 20m)
-
ULTRA Chasing EL Wire (3.2mm)
£12 per metre
This is made using 3 strands of Ultra EL Wire, and therefore is much brighter than the standard Chasing EL Wire
it needs a dedicated Chasing Driver to make it glow and like the Ultra wire it also requires more power to maintain this brightness
for the Ultra Chasing EL Wire you need to Double the length of the wire to reach the rating for the driver
eg
5m of Ultra Chasing EL Wire needs a driver rated for 10m of Standard Chasing EL Wire
(33cm, 1m, 3m, 5m)
-
Multicoloured EL Wire (5mm)
£6 per metre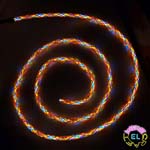
This a 5mm EL Wire with a multicoloured coating over the top
(1m, 5m, 15m, 25m)
(3m is sold out and we do not plan to restock since we have to order 3km at a time!)
-
Double Core EL Wire (3.2mm)
- £5 per metre
Double Core Wire is now in the bargain bucket and is being discontinued as the Ultra EL Wire is now easily the brightest and our premier EL Wire
this wire does have two EL Wires running through the inside of the sleeve so you will have to remember you are running twice as much EL Wire and use the correct Driver
Double core is clearly brighter than standard wire, but it is not as bright as the Ultra EL Wire
(3m, 5m, 10m, 20m)
EL Driver
it is not only the EL Wire that must be selected carefully but also the EL Driver
the higher amount of EL Wire the EL Driver is rated for, the brighter it will make the EL Wire glow
This has got to be quite a large how-to and is now divided into sections
Click the link below to jump down the page to the section you need:
Info about EL Driver / Inverters
Dimensions and weight of our EL Drivers
Info about EL Driver / Inverters
First thing to say is that an EL Driver and EL Inverter are exactly the same thing - I prefer to call them EL Drivers but technically the 'Invert' the DC current from the batteries to the AC current that makes the phosphor in the electroluminescent wire glow
The next most important thing to know about EL Drivers is that the brightness of the EL Wire has more to do with the power of the driver than the EL Wire
For example:
On this site you can find the 2xAA Drivers for 5m of EL Wire - theyre the most common EL Drivers as they are small and portable
So these 2xAA Drivers (£4) will power 1 metre of EL Wire LESS BRIGHTLY than the 8XAA Driver (£9) will drive 15 metres of EL Wire
(Unfortunately the 8XAA Driver should only be used to drive between 5 and 15 metres of wire)
This is also true for even more powerful inverters - the Inverter for 30-75 metres of wire will run that 75metres brighter than the 8XAA drives 5metres of wire
UNDERPOWERING OR OVERPOWERING EL DRIVERS
By overpowering or underpowering the EL Wire you risk damaging both the EL Wire and the Driver
eg if you are using a driver for 5 - 15 metres of wire then those lengths are recommended for a reason!
Underpowering:
By running less than 5 metres of EL Wire you risk burning out the wire and stressing the driver
Overpowering:
By running more than 15 metres of EL Wire you will be drawing too much current through the driver and this will make it heat up and possibly even catch fire
Ive never seen one catch fire but apparently it is possible
Overpowering:
Another dangerous way to overpower an inverter is by using the wrong input voltage on the Driver - say, like putting a 12v battery onto a driver designed for 6volts
Doing this makes the wire glow super bright but you can feel the driver heat up v quickly and again theres risk of a fire - just think how dangerous that is if you are wearing it!
EL Wire is an amazing material that, with the right driver can make lots of wire glow really brightly so don't push it further than it should
CHOOSING YOUR EL DRIVER
This really should be simple process
1) Decide where you are going to use the EL Wire - on clothes, in a car, in the house, near a computer? - this will tell you if you will need a portable driver, one with a car lighter attachment, a mains powered driver or a USB Driver -
A bigger selection can be found here
2) Measure out the size of the project and how much wire you will need to run off each driver
any driver can run several pieces of EL Wire using splitters
r
Dimensions and weight of our EL Drivers
Test Post
These Stickman sets are what you need to make your own neon glow stick man
they are made using 9 strands of EL Wire and create an amazing effect
(other options include using LED but there is no way to stop the LED looking like lots of separate lights so we prefer to use EL Wire)

EL Wire Stickman and Stickgirl
The El Wire can be put all round the body to make arms legs as well as expressions on the faces
the Stickman sets we sell can be made into loads of different shapes like cartoon characters, witches and robots

Homer and Bender made using the Stickman set
the EL Stick Man Set comes in a choice of 10 colours
or can even be a mixture of colours in one set
see our StickMan Set here
or the Stickgirl Set here:
all sets are 'plug and play'
Below is step by step instructions plus a video that explains how to repair or solder EL Wire:
we now have an EL Repair kit available for sale here
here is our step by step guide:
EL WIRE CARE + REPAIR
EL Wire is a very robust material - it can withstand fairly extreme temperatures between -20°C and 50°C. It is durable and the wire itself is water resistant. If the wire is likely to get wet or even be in a humid environment then make sure the end of the wire has been made fully waterproof, also the connection point is sensitive to moisture.
Even if the material itself is hardy, like any electronics it has to be looked after if you want it to last a long time.
This goes double if the EL Wire is going to be worn, where it will be exposed to various stresses that electrical items are sensitive to.
There are some tips on the back page to get the most out of your EL Wire, but you must also remember that the life of your
EL Wire will be reduced if it is exposed to repeated bending stress, extreme pulling tension or humid conditions.
REPAIRING YOUR EL WIRE
Contents of the elwirecraft EL Repair Kit:

1) 5 x Male EL Connector
2) 6-way Splitter
3) Copper Tape
4) Wide and Thin
Heatshrink Tubing
5) End Caps
You Will also Need
1) Wirecutters
2) Soldering Iron + Solder
3) Scalpel
4) Heatgun or lighter
5) Helping Hands (if possible)
EL Wire looks like this on the inside:

To make it glow, you must attach a power cable to the copper core and another to the fine ‘corona’ wires
EL Wire will be getting an Alternating Current (AC) from the driver, so the two power input wires are not considered +ve or –ve
Also, unlike most electrical appliances, the two wires never meet to make a circuit.
Instead, the current is held inside the copper core and the fine corona wires, insulated from each other by the Phosphor Paint
The High frequency of the Alternating Current excites the Phosphor Paint and makes it glow
It is important to understand how the EL Wire works to help you find out what has gone wrong if it fails.
The most important thing to note is that if the copper core and the fine corona wires ever meet and make a circuit, then the EL Wire will not glow.
Quite often, this will not only stop this EL Wire from glowing but by creating this circuit you will probably stop all the other EL Wires that share the same splitter from glowing.
When all the EL Wires on a circuit are off, this can then make the EL Driver overheat if it is still switched on!
Removing the faulty EL Wire from the splitter will then make the other EL Wires spring back into life.
Repeated bending stress may cause some of the Phosphor Paint to flake off leaving the core exposed. The corona wires are then able to come into contact with the core and make a circuit.
Another cause for failure is when the core and corona touch at the very end of the EL Wire, if the wire hasn’t been cleanly cut. Any moisture or dirt on the very end if the EL Wire will conduct current across from the core to the corona wires.
So the first step to repairing the EL Wire is to check the end and maybe even cleanly snip 1cm of EL Wire off the end to make sure this is not the fault.
If this is not the problem then the next step is to cut off the connecting wires and follow the steps on the following pages to resolder the connection back on

How to Solder Power Connector to EL Wire
1)
Use Wirestrippers to strip back about 2cm off the outside PVC Coating

2)
To help you strip back the next protective coating and leave the corona wires intact, I recommend lightly heating this inside sleeve.

Then use the wirestrippers to remove this softened plastic sleeve. Heating should prevent the corona wires underneath from being totally yanked off with the sleeve, or even damaged by the wirecutters.
* Just heat it, you don’t need to totally melt the plastic off
(you can, but its stinky and possibly toxic!)
3)
These corona wires may be fine, but they must also be strong enough for whatever you are going to put them through.
So please give them a tug to make sure they are strong and haven’t been nipped and weakened by the wirestrippers

It is better if these fine wires fail on you now and you start again, than they fail when in use.
4)
Stick a 1cm wide section of copper tape around the top of the EL Wire and allow the corona wires to be trapped inside between two layers .

This copper tape with the corona wires safely inside will be used to solder a power cable onto
5)
Now you must scrape about 1.5cm of the Phosphor Paint off to reveal the copper core underneath.

6)
Next, to prepare the Power Cable you must strip 1cm off one of the strands, then cut the other one back so it is shorter than where the other has been stripped down to.
Then you must strip that cable back 1cm also.
(please just look at the pic below if you want to know what those sentences actually mean - note that one wire is shorter than the other)

7)
If you solder enough EL Wire, you will definitely kick yourself the time when you inevitably forget this next step:
You must cut some heatshrink tubing and put about 3cm of the ‘wide’ tubing on the EL Wire and about 2cm of ’thin’ tubing on the shorter Power Cable strand.

8)
Then you must simply solder the shorter Power Cable strand directly onto the copper core

9)
The longer Power Cable is soldered directly onto the copper tape that has corona wires inside

10)
TEST THE EL WIRE – it is also worth giving it a little pull to make sure it holds fast

11)
Slide the thin heatshrink over the core and heat it up to shrink it. Leave it a sec to cool down,then slide the widerheatshrink over all of the copper tape and core.

Heat it to finish off the repair.
OTHER TIPS FOR GETTING THE MOST OUT OF EL WIRE
1) Use Decent Batteries – alkaline ones like duracell are the best. You can get unbranded ones much cheaper though(eg in UK, Maplins sell a box of 100 of them for £15)
Rechargeable batteries have a lower voltage (1.2v) compared to standard batteries (1.5v) so the wire is less bright ;(
As the batteries drain, you will find the Wire is less bright and you may even notice it becomes patchy – this is a sign to put fresh batteries in
*high power 12v Li-ion rechargeable batteries are available here *
2) Switch Driver Off After Use – if you unplug the wires from the driver it will still carry on draining the batteries. Plus, this damages the inverter inside if it is on with no EL Wire attached.
This is important to note if you are using an external switch – it can be used to produce an effect, but remember to turn the whole unit off at the driver once you have finished
3) Adding More Wire – you can ‘daisy chain’ many splitters together and have many wires coming off a single inverter.
The more powerful drivers will drive the wire brighter
(eg the 8xAA driver runs 15m of EL wire brighter than the weaker 2xAA driver powering just 1m of wire)
4) Any Glue Is Fine – for fixing wire to a costume. E6000 or Hot Glue is the best. Remember if it is being permanently fixed to clothing it will be hard to replace if it fails as some point.
If you sew the EL Wire in, then it is not only easier to replace, but you can also unthread it to wash the garment
5) Protect The Connection Point – The inch of tubing where the power wire joins to the glowing EL Wire is BY FAR the most fragile and vulnerable area of the EL Wire.
Lightpainters are advised to tape up and reinforce this part (as well as the wires that come out of the EL Driver) before they start swinging it around.
If you’re using it on a costume, be sure to keep this part away from elbows or anywhere it will suffer stress.
*please link to this source if reproducing this material*
elwirecraft.co.uk 01323 871527 [email protected]