
Below is step by step instructions plus a video that explains how to repair or solder EL Wire:
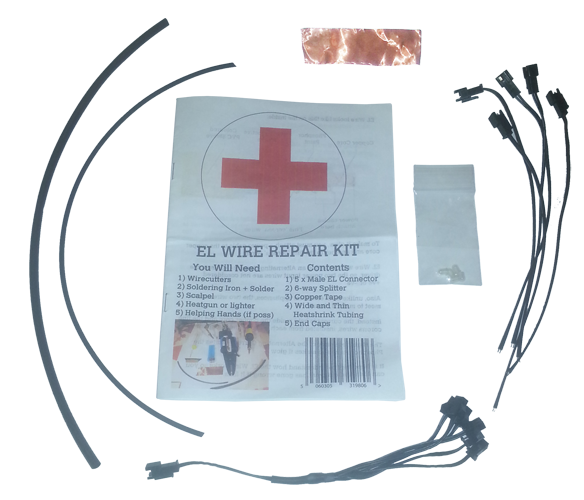
we now have an EL Repair kit available for sale here
here is our step by step guide:
EL WIRE CARE + REPAIR
EL Wire is a very robust material - it can withstand fairly extreme temperatures between -20°C and 50°C. It is durable and the wire itself is water resistant. If the wire is likely to get wet or even be in a humid environment then make sure the end of the wire has been made fully waterproof, also the connection point is sensitive to moisture.
Even if the material itself is hardy, like any electronics it has to be looked after if you want it to last a long time.
This goes double if the EL Wire is going to be worn, where it will be exposed to various stresses that electrical items are sensitive to.
There are some tips on the back page to get the most out of your EL Wire, but you must also remember that the life of your
EL Wire will be reduced if it is exposed to repeated bending stress, extreme pulling tension or humid conditions.
REPAIRING YOUR EL WIRE
Contents of the elwirecraft EL Repair Kit:
1) 5 x Male EL Connector
2) 6-way Splitter
3) Copper Tape
4) Wide and Thin
Heatshrink Tubing
5) End Caps
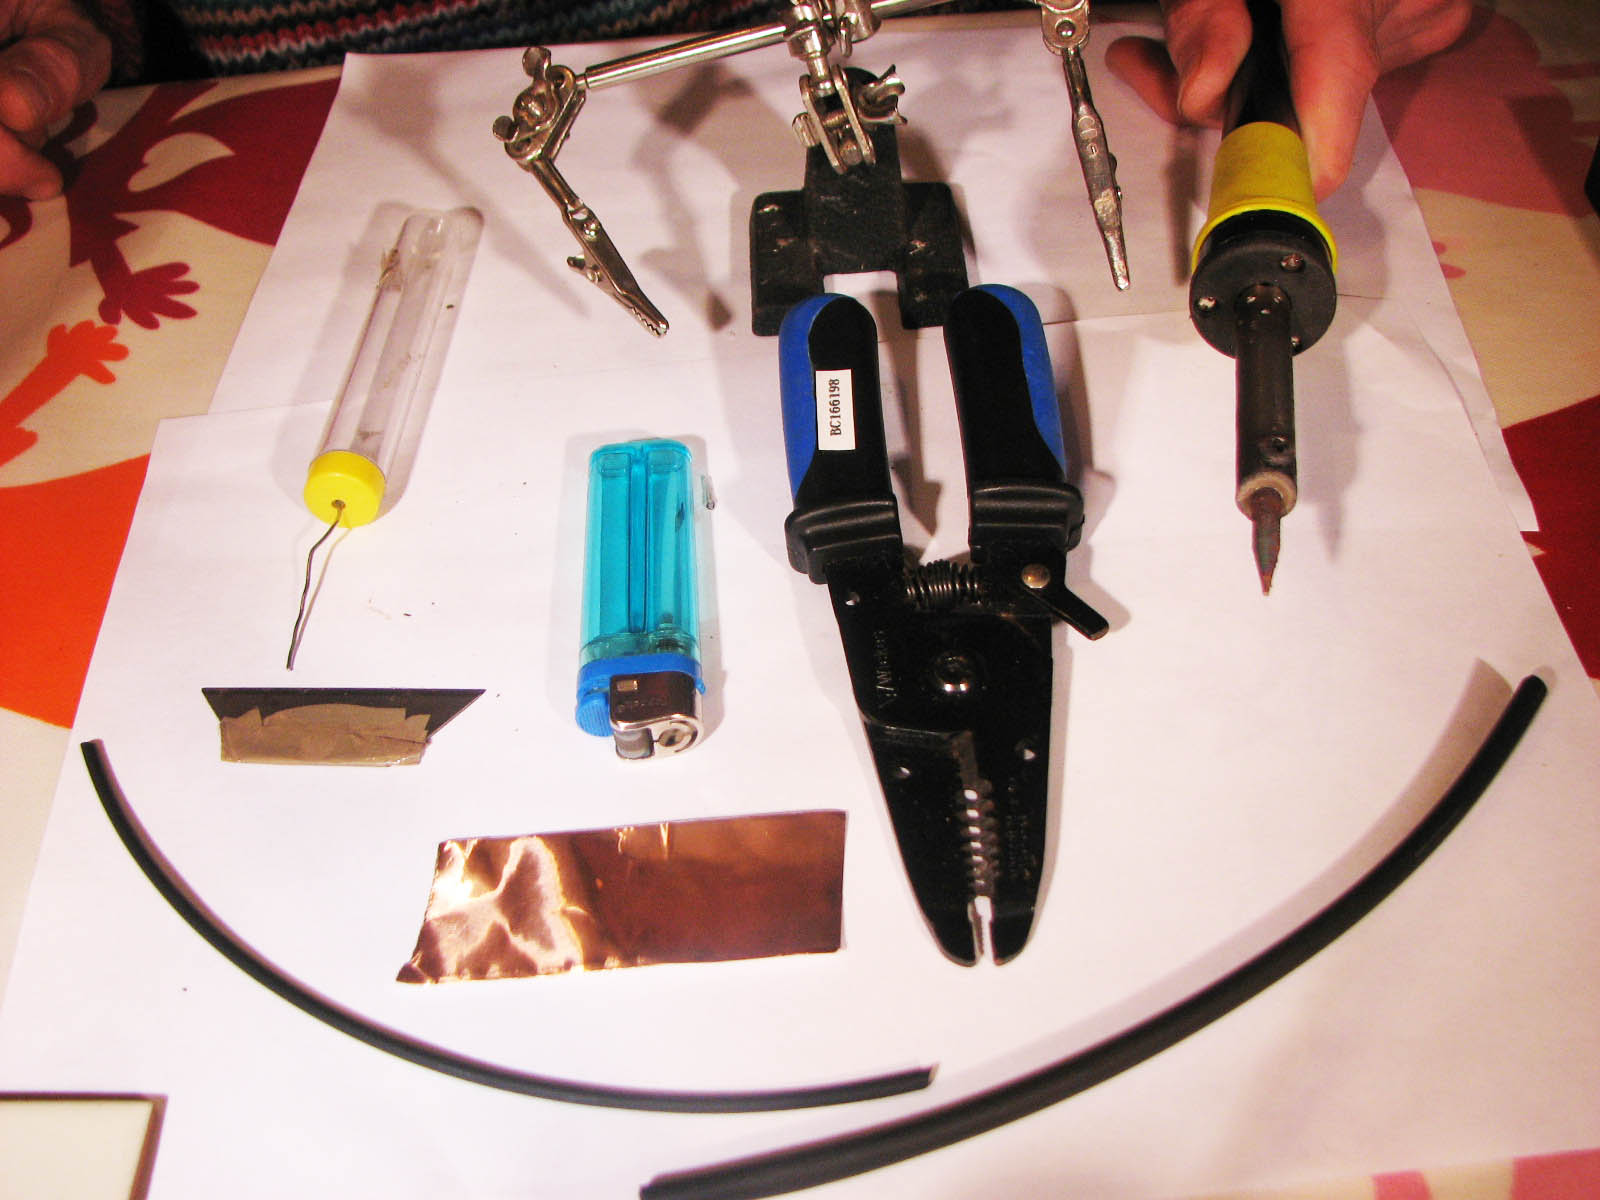
You Will also Need
2) Soldering Iron + Solder
3) Scalpel
4) Heatgun or lighter
5) Helping Hands (if possible)
EL Wire looks like this on the inside:
To make it glow, you must attach a power cable to the copper core and another to the fine ‘corona’ wires
EL Wire will be getting an Alternating Current (AC) from the driver, so the two power input wires are not considered +ve or –ve
Also, unlike most electrical appliances, the two wires never meet to make a circuit.
Instead, the current is held inside the copper core and the fine corona wires, insulated from each other by the Phosphor Paint
The High frequency of the Alternating Current excites the Phosphor Paint and makes it glow
It is important to understand how the EL Wire works to help you find out what has gone wrong if it fails.
The most important thing to note is that if the copper core and the fine corona wires ever meet and make a circuit, then the EL Wire will not glow.
Quite often, this will not only stop this EL Wire from glowing but by creating this circuit you will probably stop all the other EL Wires that share the same splitter from glowing.
When all the EL Wires on a circuit are off, this can then make the EL Driver overheat if it is still switched on!
Removing the faulty EL Wire from the splitter will then make the other EL Wires spring back into life.
Repeated bending stress may cause some of the Phosphor Paint to flake off leaving the core exposed. The corona wires are then able to come into contact with the core and make a circuit.
Another cause for failure is when the core and corona touch at the very end of the EL Wire, if the wire hasn’t been cleanly cut. Any moisture or dirt on the very end if the EL Wire will conduct current across from the core to the corona wires.
So the first step to repairing the EL Wire is to check the end and maybe even cleanly snip 1cm of EL Wire off the end to make sure this is not the fault.
If this is not the problem then the next step is to cut off the connecting wires and follow the steps on the following pages to resolder the connection back on
How to Solder Power Connector to EL Wire
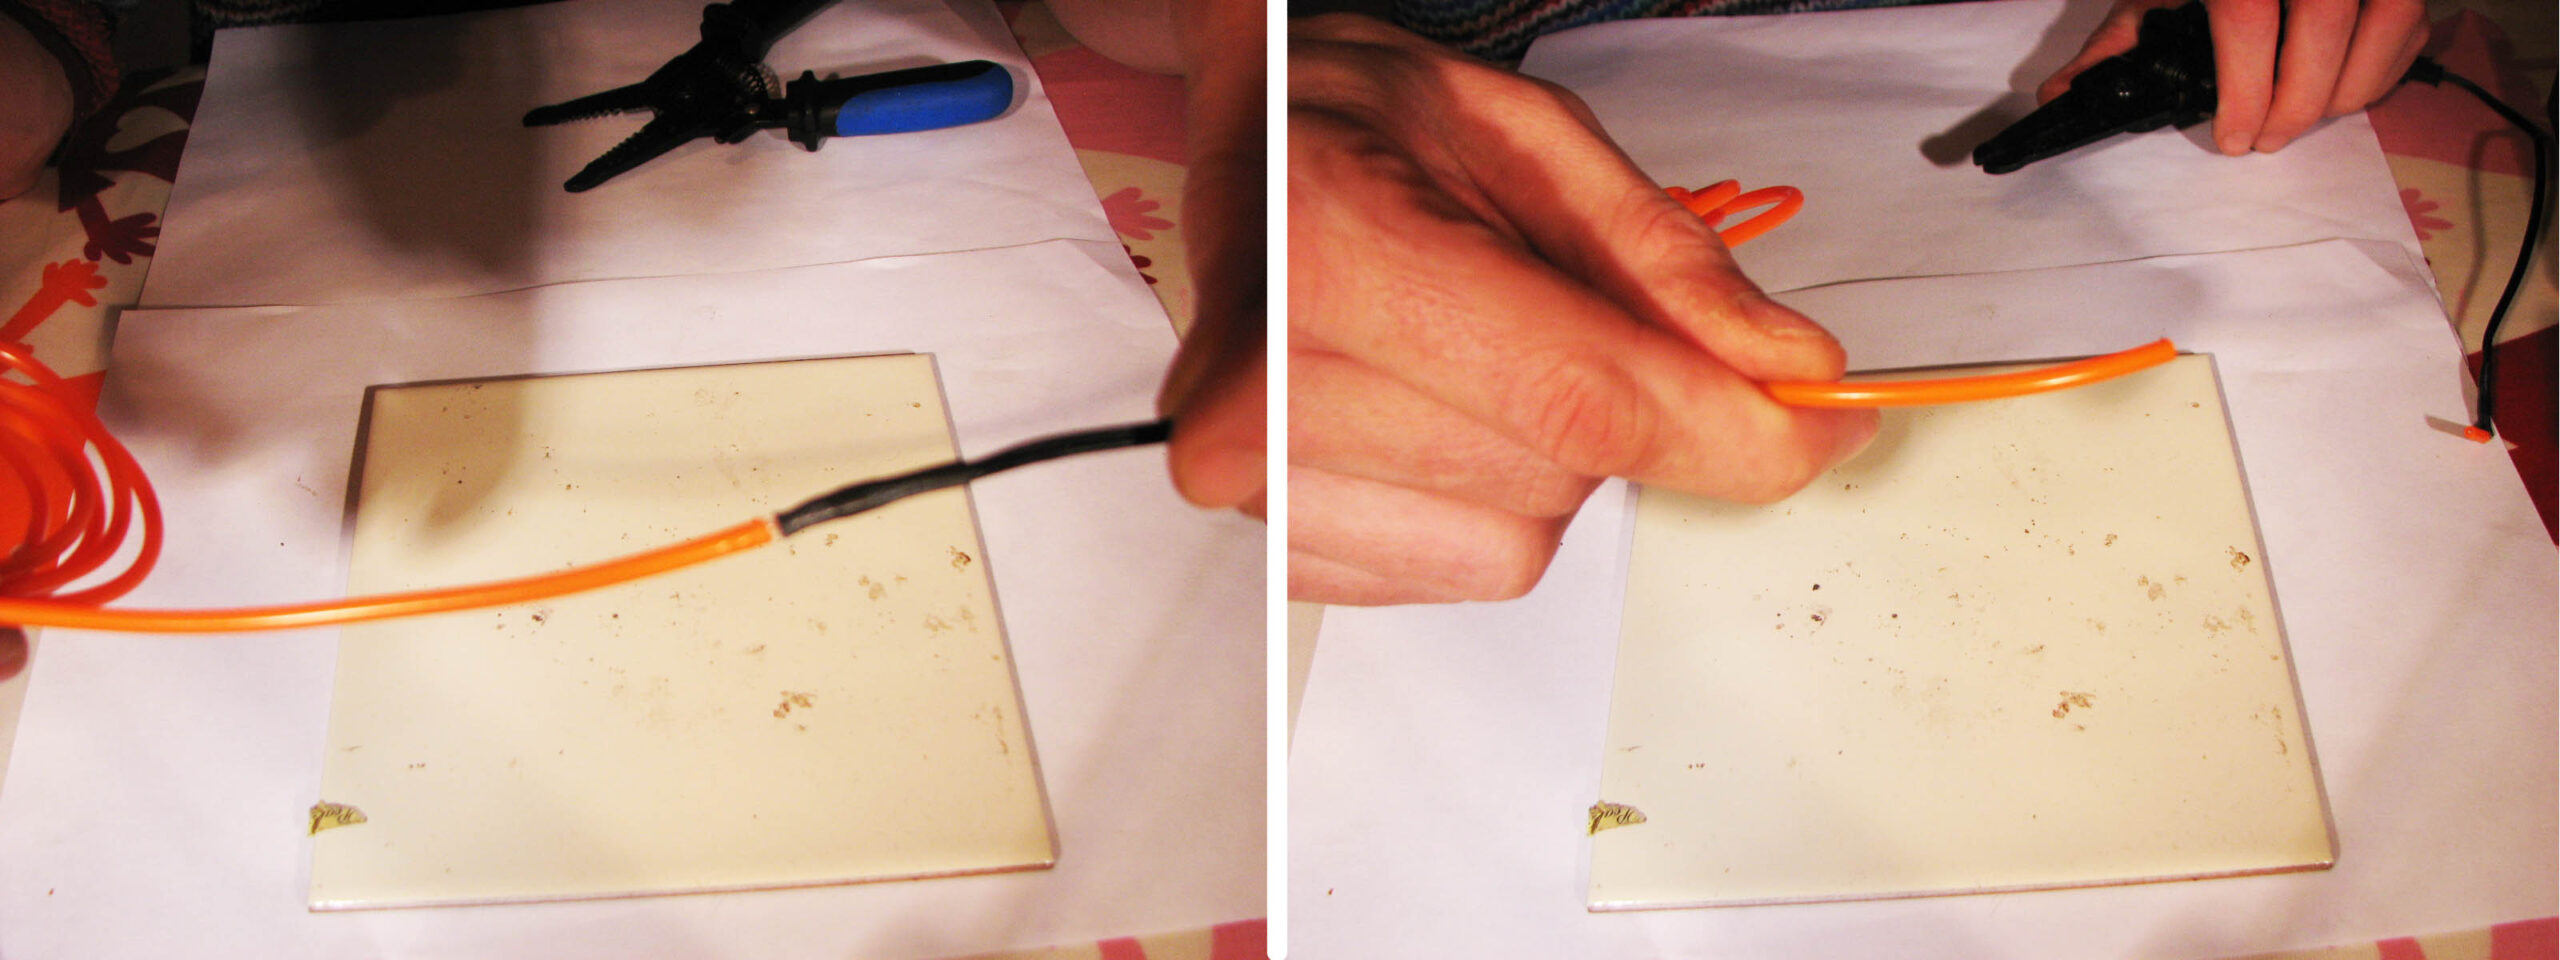
1)
Use Wirestrippers to strip back about 2cm off the outside PVC Coating
2)
To help you strip back the next protective coating and leave the corona wires intact, I recommend lightly heating this inside sleeve.
Then use the wirestrippers to remove this softened plastic sleeve. Heating should prevent the corona wires underneath from being totally yanked off with the sleeve, or even damaged by the wirecutters.
* Just heat it, you don’t need to totally melt the plastic off
(you can, but its stinky and possibly toxic!)
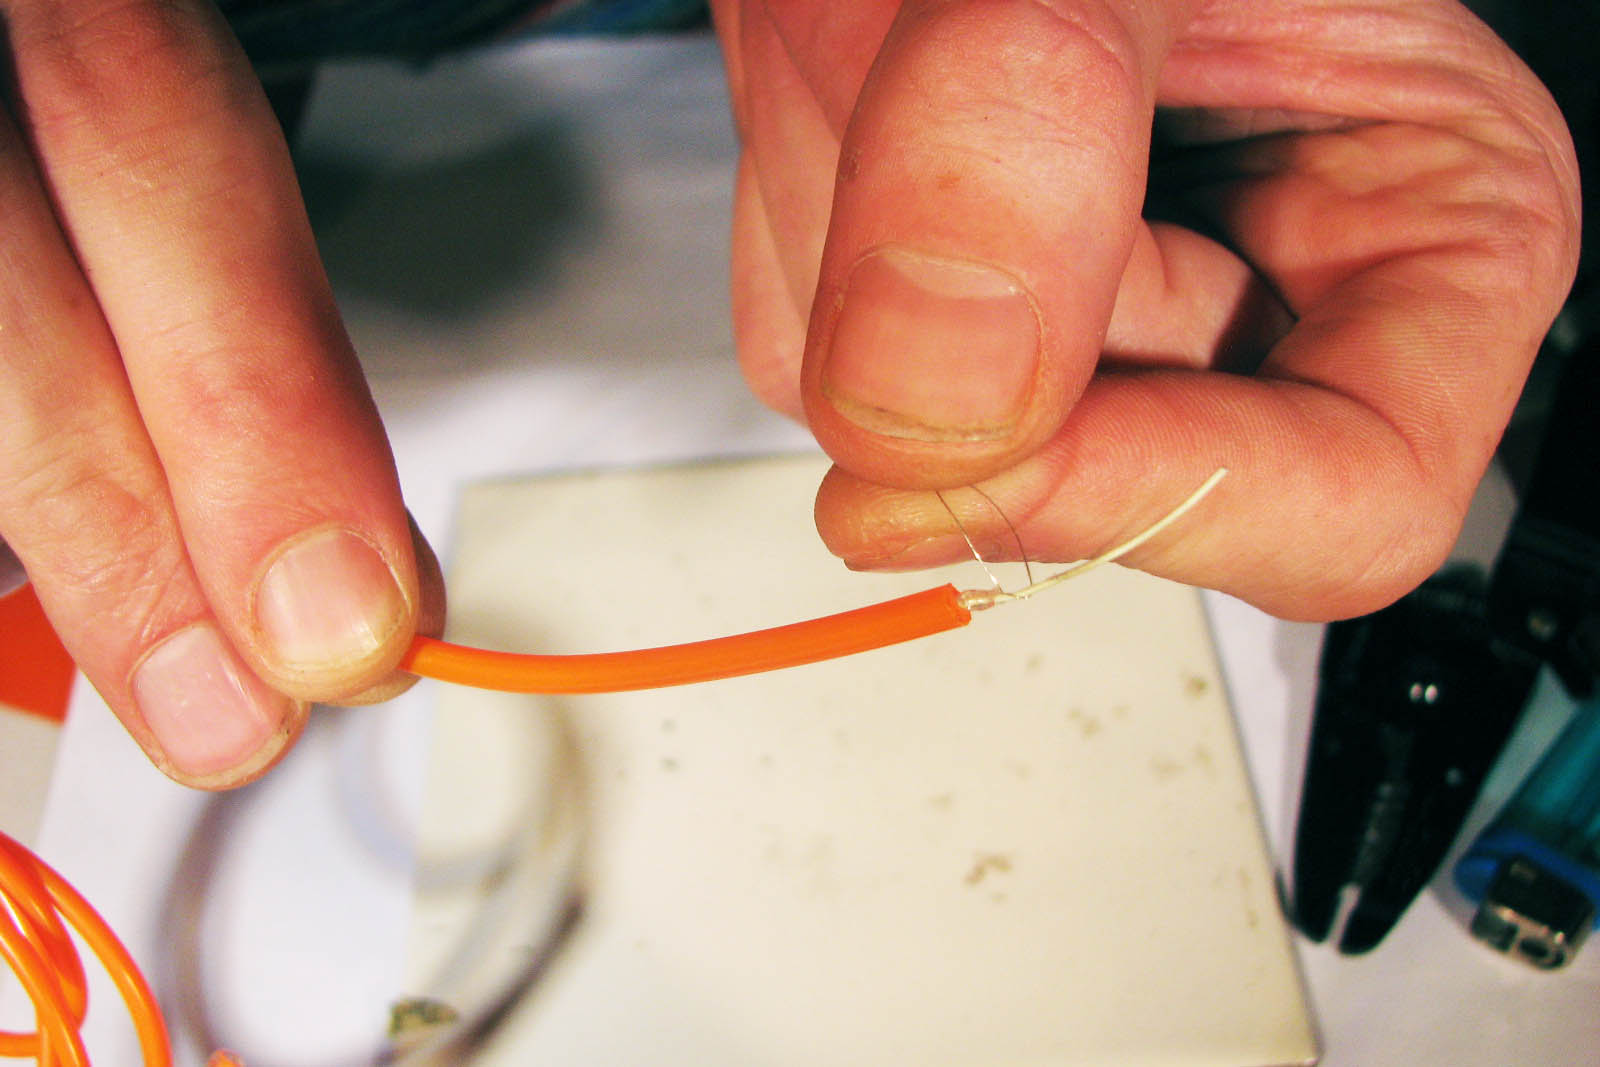
3)
These corona wires may be fine, but they must also be strong enough for whatever you are going to put them through.
So please give them a tug to make sure they are strong and haven’t been nipped and weakened by the wirestrippers
It is better if these fine wires fail on you now and you start again, than they fail when in use.
4)
Stick a 1cm wide section of copper tape around the top of the EL Wire and allow the corona wires to be trapped inside between two layers .
This copper tape with the corona wires safely inside will be used to solder a power cable onto
5)
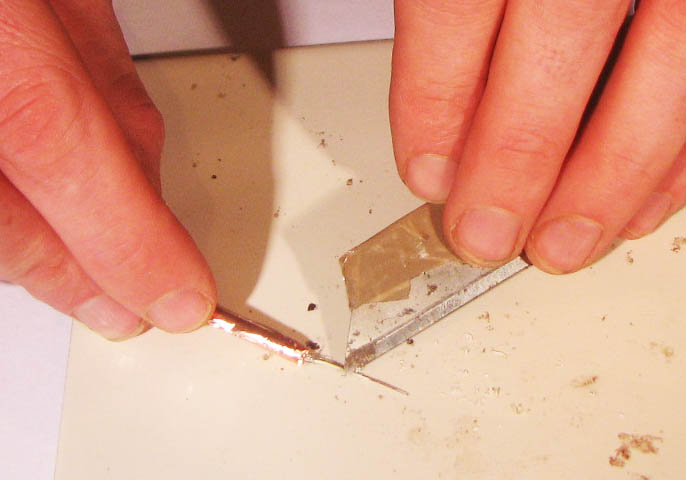
Now you must scrape about 1.5cm of the Phosphor Paint off to reveal the copper core underneath.
6)
Next, to prepare the Power Cable you must strip 1cm off one of the strands, then cut the other one back so it is shorter than where the other has been stripped down to.
Then you must strip that cable back 1cm also.
(please just look at the pic below if you want to know what those sentences actually mean - note that one wire is shorter than the other)
7)
If you solder enough EL Wire, you will definitely kick yourself the time when you inevitably forget this next step:
You must cut some heatshrink tubing and put about 3cm of the ‘wide’ tubing on the EL Wire and about 2cm of ’thin’ tubing on the shorter Power Cable strand.
8)
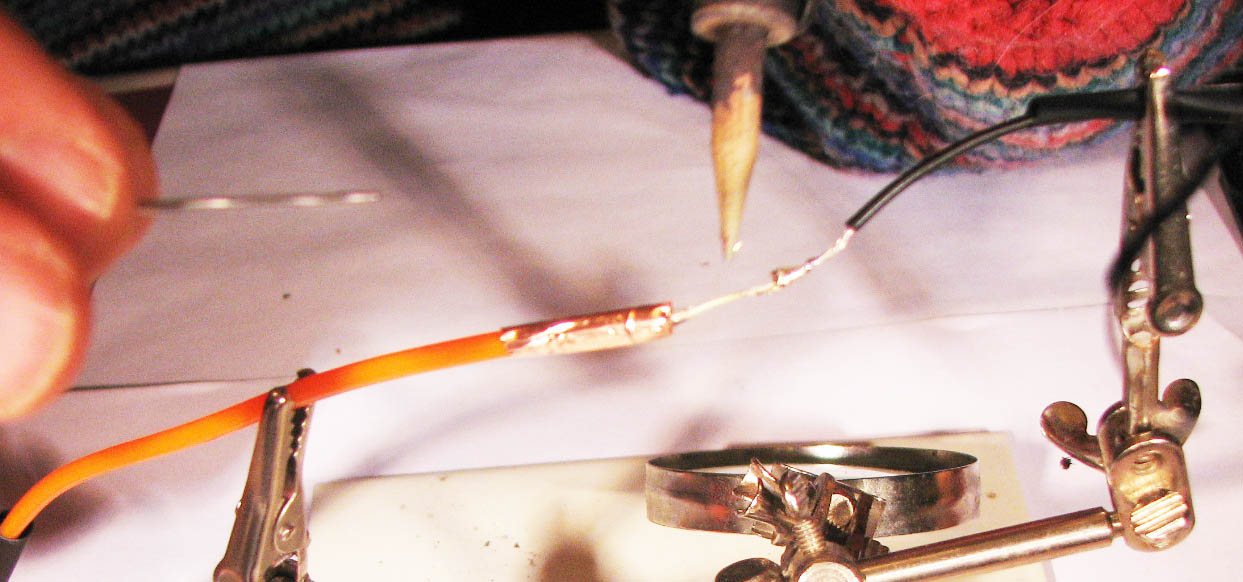
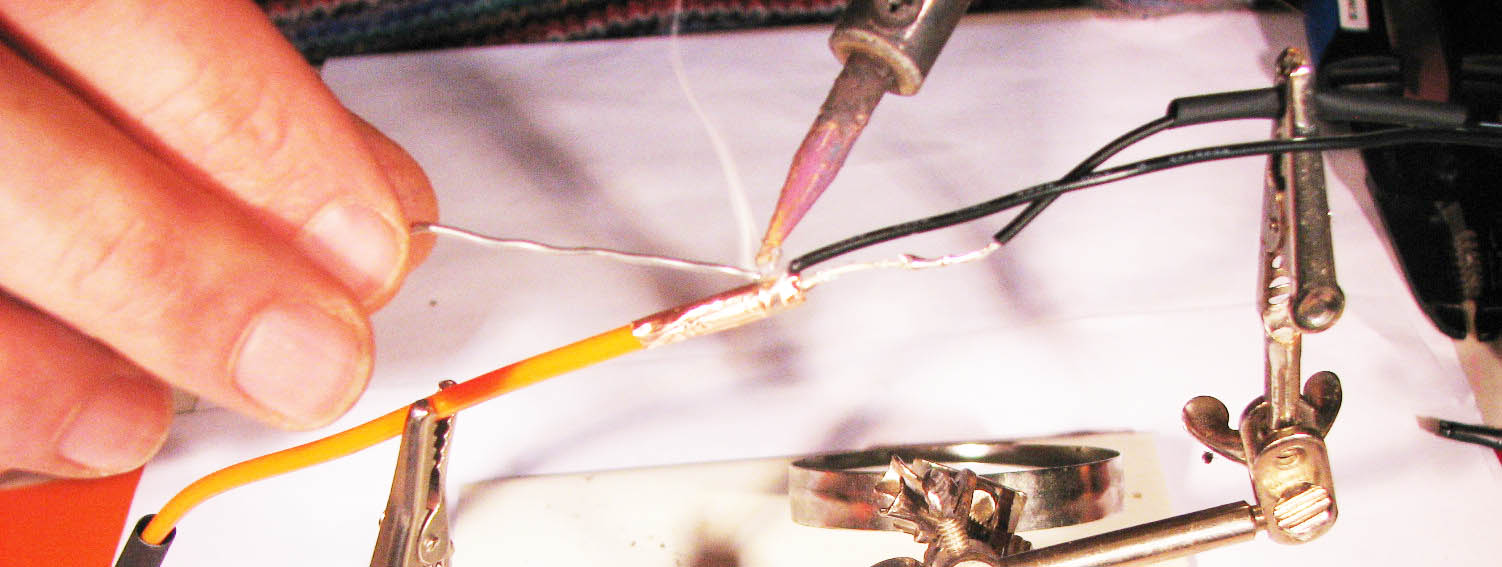
Then you must simply solder the shorter Power Cable strand directly onto the copper core
9)
The longer Power Cable is soldered directly onto the copper tape that has corona wires inside
10)
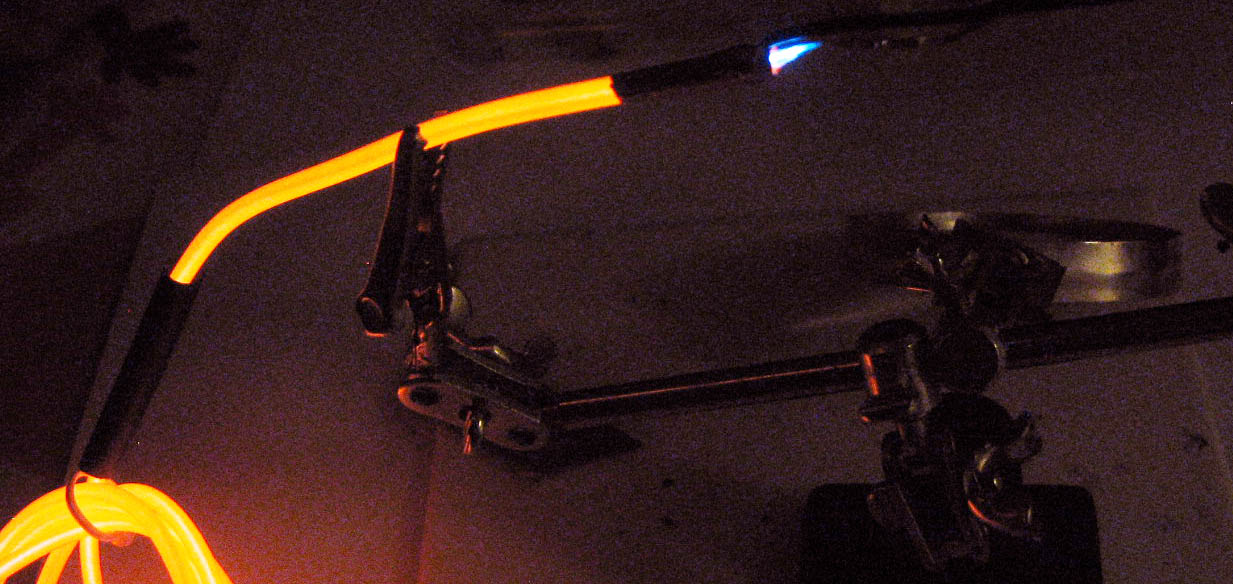
TEST THE EL WIRE – it is also worth giving it a little pull to make sure it holds fast
11)
Slide the thin heatshrink over the core and heat it up to shrink it. Leave it a sec to cool down,then slide the widerheatshrink over all of the copper tape and core.
Heat it to finish off the repair.
OTHER TIPS FOR GETTING THE MOST OUT OF EL WIRE
1) Use Decent Batteries – alkaline ones like duracell are the best. You can get unbranded ones much cheaper though(eg in UK, Maplins sell a box of 100 of them for £15)
Rechargeable batteries have a lower voltage (1.2v) compared to standard batteries (1.5v) so the wire is less bright ;(
As the batteries drain, you will find the Wire is less bright and you may even notice it becomes patchy – this is a sign to put fresh batteries in
*high power 12v Li-ion rechargeable batteries are available here *
2) Switch Driver Off After Use – if you unplug the wires from the driver it will still carry on draining the batteries. Plus, this damages the inverter inside if it is on with no EL Wire attached.
This is important to note if you are using an external switch – it can be used to produce an effect, but remember to turn the whole unit off at the driver once you have finished
3) Adding More Wire – you can ‘daisy chain’ many splitters together and have many wires coming off a single inverter.
The more powerful drivers will drive the wire brighter
(eg the 8xAA driver runs 15m of EL wire brighter than the weaker 2xAA driver powering just 1m of wire)
4) Any Glue Is Fine – for fixing wire to a costume. E6000 or Hot Glue is the best. Remember if it is being permanently fixed to clothing it will be hard to replace if it fails as some point.
If you sew the EL Wire in, then it is not only easier to replace, but you can also unthread it to wash the garment
5) Protect The Connection Point – The inch of tubing where the power wire joins to the glowing EL Wire is BY FAR the most fragile and vulnerable area of the EL Wire.
Lightpainters are advised to tape up and reinforce this part (as well as the wires that come out of the EL Driver) before they start swinging it around.
If you’re using it on a costume, be sure to keep this part away from elbows or anywhere it will suffer stress.
*please link to this source if reproducing this material*
elwirecraft.co.uk 01323 871527 [email protected]
